Resizing, cropping and effects
Resize, crop, trim, rotate and flip the whole sprite, apply effects and color adjustments, and step back through the undo history.
The Sprite menu changes the sprite as a whole: its size, its canvas, its orientation. The Filter menu's effects and adjustments recolor and filter the pixels of one cel or many. Every one of them is a single undo step.
Sprite size and canvas size
- Sprite > Sprite Size... (Ctrl+Alt+I) scales the sprite to a new Width and Height (1 to 4096 pixels). Every cel is resized with nearest-neighbor scaling, so pixels stay sharp and no new colors appear; slices, tilesets and the selection scale with it. Width and height are separate: work out the other side yourself to keep the proportions.
- Sprite > Canvas Size... (Alt+C) changes the size of the canvas without scaling the art. Pick an Anchor in the 3×3 grid: where the existing art sits in the new canvas (the middle keeps it centered, the top-left corner grows or shrinks the canvas to the right and down). With the middle anchor an odd difference puts the extra column on the right and the extra row on top, so shrinking back undoes it exactly. Art that ends up outside a smaller canvas isn't lost: it's kept past the edge, out of view, and comes back if the canvas grows again (as in Aseprite). The Background layer is cut to the canvas, and filled out with the background color when it grows.
Crop and trim
- Sprite > Crop to Selection makes the canvas the selection's bounding box. It needs a selection (Selecting and transforming). A selection that reaches past the canvas grows it on that side.
- Sprite > Trim cuts the canvas down to the smallest rectangle that holds what's drawn, across every frame. It looks at the sprite as shown: hidden layers don't count, and a solid border color (such as an opaque Background) is trimmed like transparency. When two opposite edges are solid in different colors, or nothing is drawn, the sprite is left as it is.
Like Canvas Size, crop and trim keep the art outside the new canvas rather than deleting it.
Rotate and flip the canvas
Sprite > Rotate 90° CW and Sprite > Rotate 90° CCW turn the whole sprite by a quarter turn (width and height swap), and Sprite > Flip Canvas Horizontal and Sprite > Flip Canvas Vertical mirror it. These act on every layer and frame, locked layers included, and take the slices and the selection along. Art past the canvas edge turns and mirrors with the rest, so turning back restores it.
To turn or flip only the selection or one cel, use Edit > Transform or the Layer menu's flips instead (Selecting and transforming).
Sprite properties and pixel ratio
File > Rename Sprite... shows the sprite's name, size and its count of layers and frames, and has:
- Color Mode: RGB, Grayscale or Indexed (Color and palettes);
- Transparent Color, the palette index that stands for transparent (indexed sprites);
- Pixel Ratio: 1:1, 2:1, 1:2, or Custom (each side 1 to 255);
- user data: a color, a note and custom properties for the sprite (below).
Nothing changes until you choose Save, which applies everything at once; one undo step takes back the color mode, transparent color, pixel ratio and user data together. Cancel leaves the sprite as it was.
The pixel ratio makes pixels non-square, as some old consoles and computers showed them: at 2:1 each pixel is twice as wide as it is tall. The canvas shows the sprite stretched; the pixels themselves don't change. Exports stay one file pixel per sprite pixel unless you turn on Apply pixel ratio in the Export dialog (Opening, importing and exporting). You can also set the pixel ratio when you make a sprite.
User data and custom properties
Anything that can be annotated has a User Data section in its properties dialog: the sprite,
a layer or group, a cel, a tag, a slice and a tileset (Tileset Properties). It holds a
color (not on tags, which have their own), a note, and custom properties: named values
that a game or tool reads from the exported data. Slices export theirs in the sprite sheet JSON,
and .aseprite files keep all of them, so they come back when the file is reopened.
Properties are grouped by namespace. Yours is the plain list; Add extension namespace makes a list that belongs to a named extension, as Aseprite's extensions do. In each list:
- Add property adds a row with a name, a type and a value; Add item does the same inside a vector. The arrows move a row up or down and the bin removes it.
- Pick the type of a value: Boolean, Null, String, UUID, a whole number of a given size (Int8 to UInt64), Fixed, Float or Double, Point (X, Y), Size (W, H), Rect (X, Y, W, H), or a Vector (a list) or Map (named properties) that holds more rows. Changing a row's type keeps its value where the new type allows it.
- A value that doesn't fit its type (a UInt8 of 300, a UUID with the wrong shape, a repeated name) is marked on its row, and Save waits until it's fixed. Whole numbers are checked against the range of their type.
Edit as JSON shows the same properties as text, for copying and pasting. Everything except
text, true/false and plain numbers is written as { "$type": "uint8", "value": 7 }; scripts use
the same form with app.setUserData. Switching back to rows needs the JSON to be valid.
Duplicating a sprite
Sprite > Duplicate Sprite copies the sprite, with all its layers, frames and slices, into a new sprite named "name copy" in the same project.
Effects and adjustments
The Filter menu has the same filters as Aseprite's Edit menu (Brightness/Contrast, Hue/Saturation and Color Curve work out their colors their own way; see each one below):
- Tone and color: Filter > Brightness/Contrast..., Filter > Hue/Saturation..., Filter > Color Curve..., Filter > Levels..., Filter > Threshold..., Filter > Gradient Map... and Filter > Color Balance...;
- Replacing and reducing colors: Filter > Invert Color... (Ctrl+I), Filter > Replace Color..., Filter > Posterize... and Filter > Reduce Colors...;
- Shapes: Filter > Outline..., Filter > Drop Shadow..., Filter > Anti-Alias... and Filter > Auto-Shade...;
- Neighborhood filters: Filter > Despeckle... and Filter > Convolution Matrix....
Each opens a dialog. While it's open, the canvas shows a live preview of the active cel; turn Preview off to compare. OK applies the effect as one undo step, Cancel leaves the sprite alone.
What they change. With a selection, an effect only changes pixels inside it; without one, it changes the whole cel. The dialog says which. Apply to chooses the cels:
| Apply to | Cels |
|---|---|
| Active cel | The cel you're on (the default, when its layer can be edited). |
| Selected cels in timeline | The cels selected in the timeline. |
| All frames of this layer | The active layer's cel in every frame. |
| All layers in this frame | Every layer's cel in the current frame. |
| Everything | Every cel of the sprite. |
The effects work on image layers. Brightness/Contrast, Hue/Saturation, Color Curve, Invert Color, Replace Color and Posterize also work on tilemap layers: they edit the tiles the cel places, so every placement of those tiles changes. The last three choices skip layers that are locked or hidden, and layers the effect can't take, and tell you how many cels they left out. The menu items are grayed out only when no layer can take the effect. When the active layer can't take the effect (it's locked, hidden, a group, or a tilemap for the other effects), the dialog starts at Everything.
On the Background layer the effects never change alpha, because it has no transparency: the alpha options are ignored there, and Replace Color changes only the color.
Indexed sprites
In an indexed sprite, the color adjustments (everything except Despeckle, Convolution Matrix, Reduce Colors, Drop Shadow, Anti-Alias and Auto-Shade, which always remap) have an Indexed choice:
- Remap to nearest (the default) changes the pixels, then snaps each one to its nearest palette color. The palette stays as it is.
- Modify palette changes the palette entries the chosen cels use, instead of the pixels. Every pixel that uses those entries changes, in any cel, and the selection is ignored. In a sprite whose palette changes over time, each frame's own palette is edited.
The effects
Outline
Draws an outline around shapes, edging them against transparent pixels.
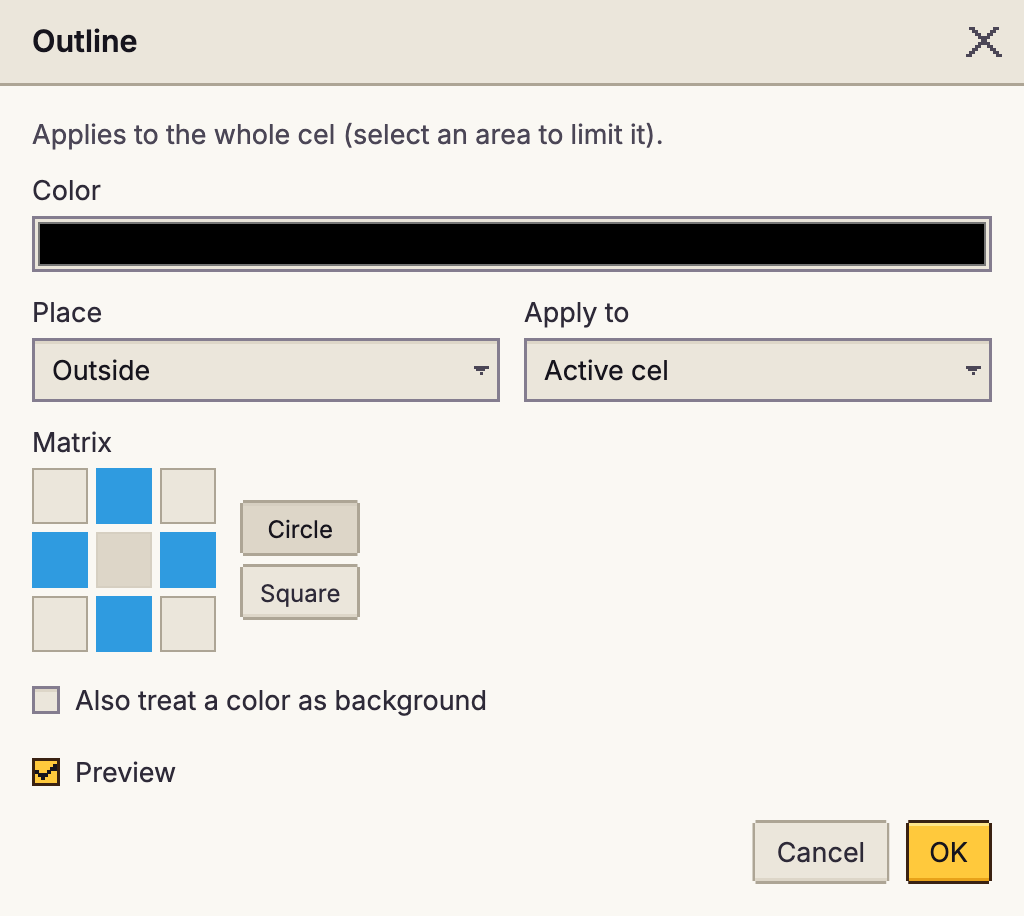
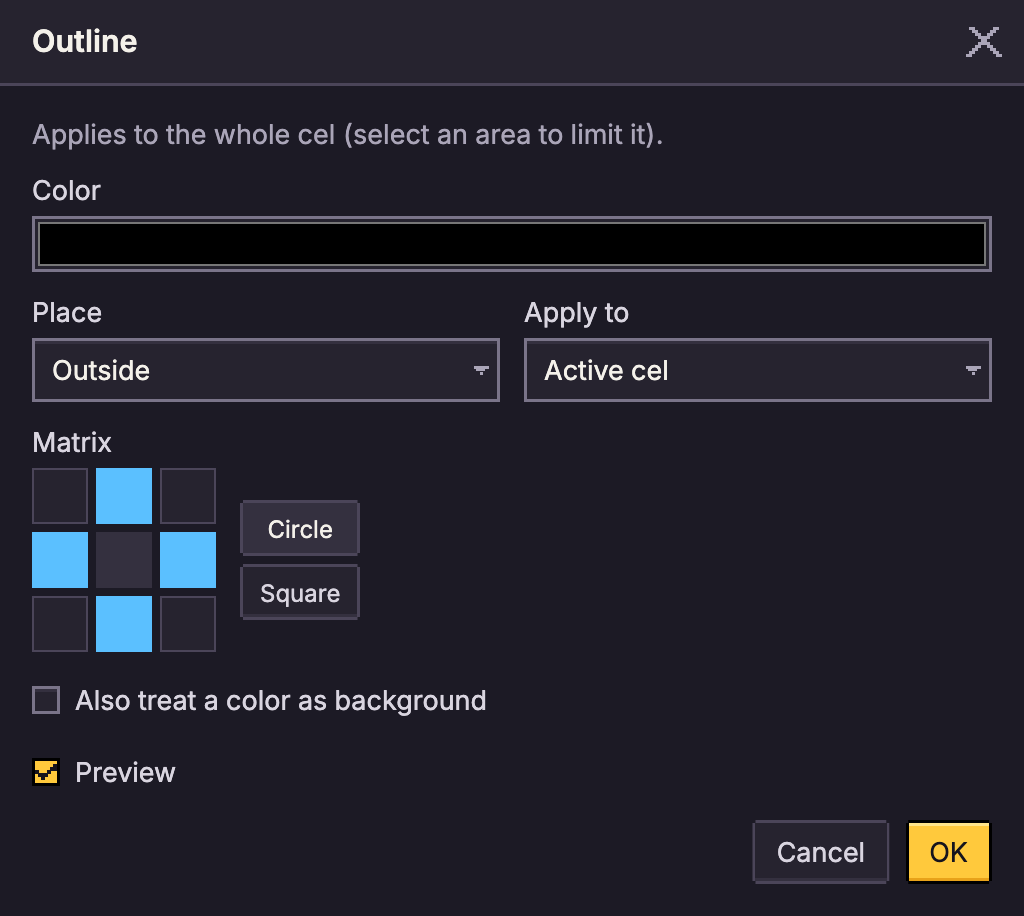
- Color: the outline color; it starts as the foreground color. In an indexed sprite, pick a palette entry.
- Place: Outside paints the transparent pixels touching the shape, so the shape grows; Inside repaints the shape's own edge pixels, so it keeps its size. The canvas edge doesn't count as transparent, so a shape that runs off the canvas isn't outlined along it.
- Matrix: which of the eight neighbors count as touching. Circle uses the four above, below and to the sides (no corners); Square uses all eight. Click a cell to switch it.
- Also treat a color as background: a Bg Color that counts as empty, like transparency, for outlining art drawn on a solid color.
Posterize
Levels (2 to 32, default 4): how many steps each color channel keeps. Fewer levels give flatter, bolder color.
Despeckle
Removes stray single pixels with a median filter: each pixel takes the middle value of the pixels around it. Window sets the area, from 1 × 1 to 9 × 9 (default 3 × 3); larger windows smooth more.
Convolution Matrix
Runs a kernel filter over the pixels.
- Preset: Identity, Gaussian Blur 3x3 (the default, the same as Aseprite's Blur 3x3), Box Blur 3x3, Gaussian Blur 5x5, Box Blur 5x5, Sharpen, Edge Detect, Emboss, Sobel Horizontal and Sobel Vertical. A gaussian blur weighs the middle pixels most, so it is softer than a box blur, which weighs every pixel alike. Editing a weight makes it Custom.
- Size: 1 × 1 to 9 × 9, and the grid of weights to edit.
- Divisor: what the weighted sum is divided by; Auto (kernel sum) works it out.
- Bias: added to every result (-255 to 255).
- Red, Green, Blue, Alpha: which channels it changes (alpha is off by default).
- Edges: at the cel's border, Clamped repeats the edge pixels, Tiled wraps around to the other side.
Reduce Colors
Maps the art onto a few colors, optionally dithered, without changing the color mode: a quick way to give painted or imported art a limited palette, or to preview how it would look in indexed color. Transparency is kept.
- Colors: Generate from the cels picks the best Colors (2 to 256) from every cel Apply to covers, shown as swatches; The sprite's palette uses the palette instead (its transparent entry left out).
- Dithering and Amount: the same choices as converting to indexed (Color modes). Pick an ordered pattern for animation.
Brightness/Contrast
Brightness and Contrast, each from -100 to 100. Brightness adds the same amount to every channel (at 100, 255 levels: black becomes white), then contrast spreads the channels away from mid-gray or pulls them toward it (at -100 everything is mid-gray, at 100 almost every channel is 0 or 255). Aseprite's version differs: it scales brightness, so black stays black.
Hue/Saturation
- Mode: HSV, HSL or OKLCH. In HSV the third slider is Value, which moves the brightest channel toward full or zero; in HSL and OKLCH it's Lightness, which moves toward white or black.
- OKLCH is perceptual: turning the hue keeps every color's perceived lightness, so yellows don't jump brighter and blues darker the way they do in HSV or HSL, and Saturation scales chroma. A color pushed past what the screen can show loses saturation rather than shifting hue or lightness. Use it to recolor a whole sprite while keeping its shading readable.
- Hue (-180 to 180), Saturation, Value or Lightness, and Alpha (each -100 to 100). Positive Lightness, Value and Alpha move that share of the remaining way to full: +50 takes black to mid-gray and half-transparent pixels three quarters opaque. Negative ones scale down, so -100 reaches black or transparent. Aseprite's multiplies instead, so black stays black there.
Levels
Sets where black, white and the midtones sit, per channel: Input black and Input white (0 to 255) are the values that become the darkest and lightest; Midtones (gamma, 0.10 to 5) brightens (above 1) or darkens (below 1) what's between; Output black and Output white limit the range the result can use, and an output white below the black inverts the channel. Pick RGB to change all three channels together, or Red, Green or Blue to change one after that (not on grayscale sprites, which have one gray channel).
Threshold
Turns every pixel one of two colors by its brightness: Level (0 to 255) is the brightness a pixel needs to become the At or above color instead of the Below color (black and white by default). Brightness is the same luma Aseprite uses for grayscale. Pixels keep their own alpha.
Gradient Map
Recolors the art by brightness through a gradient: the darkest pixels take the first stop's color, the lightest the last, and the rest what lies between. Add stops, set their Position and color, and choose the space they Blend in: RGB, OKLab (even-looking steps, the default) or OKLCH. Reverse runs the gradient from light to dark. Pixels keep their own alpha.
Color Balance
Shifts the color of one tonal range: pick Shadows, Midtones or Highlights and move the Cyan - Red, Magenta - Green and Yellow - Blue sliders (-100 to 100). Each pixel is shifted by how dark or light it is, so shadows fade into midtones and midtones into highlights. Preserve luminosity (on by default) puts back the lightness the shift changed, so only the color moves. On grayscale sprites there is a single Lightness slider.
Drop Shadow
Writes a shadow into the cels. Style is Drop shadow (offset Across and Down, up to 10 pixels either way), Glow (no offset) or Inner shadow (over the art, along the edge facing away from the offset). Spread grows it up to 10 pixels, in a Round, Square or Diamond shape, and the color's Opacity sets how strongly it shows. Softness (up to 8 pixels) fades its edge; at 0 the edge is hard. Edges sets how a soft edge is drawn: Dithered (the default: a dither pattern of the one shadow color that stays put as the art moves), Hard (cut at half strength) or Smooth (half-transparent pixels). Dithered and Hard add no in-between colors. A shadow outside the art grows the cel (up to the canvas edge) and sits underneath it. On an indexed sprite the result snaps to the palette.
Add as Layer Effect in this dialog and in the other adjustments keeps the same settings live instead of writing them: see Layer effects.
Anti-Alias
Smooths the stair steps where one color meets another, the way pixel artists do it by hand: not a blur, but a few in-between colors placed next to each step. Pick Color A and Color B (they start as the foreground and background colors; the swatches under each are the layer's most used colors). Straight edges, corners and 45-degree diagonals stay crisp. The longer the straight run before a step, the more pixels get an in-between color, up to In-between colors (1 to 4, blended from A to B in OKLCH). Smooth into chooses the side that is repainted: Color B (the default: around the shape, best for a line on a known background), Color A (inside the shape, so its silhouette doesn't grow; a one-pixel line is left alone) or Both. Strength sets how far along each run the smoothing reaches (100: up to half the run). Colors set to Palette only uses the nearest palette colors instead; indexed sprites always do.
To smooth an outline against a transparent background, set Color B's Opacity to 0 (any transparent pixel) and tick Any visible color is A: the in-betweens are the edge's own colors fading out. Palette colors can't fade, so with Palette only (and on indexed sprites) they become solid or nothing. Add as Layer Effect keeps it live; on a sprite with a color depth the result stays on the depth.
Auto-Shade
Shades flat colors in one pass, the way pixel artists add highlights and shadows by hand. Shade is Base color only (the pixels of Base color; the swatches under Most common colors are the cel's most used colors) or Every flat color (each color gets a ramp of its own). The light comes from Light angle, in degrees counterclockwise from the right: 90 is above, 135 the top left (the default). Pixels near the edge facing the light get up to Highlights lighter steps (0 to 5) and pixels near the far edge up to Shadows darker steps, the edge itself the strongest; each step is Step width pixels deep (1 to 4). A part 1 pixel thick keeps its color and one 2 pixels thick gets one highlight and one shadow, so thin parts never turn all dark.
The steps are worked out from the color in OKLCH. Hue shift turns highlights toward a warm yellow and shadows toward a cool blue, as pixel artists do, and Chroma per step makes each step more (or less) colorful. Rim light adds a thin highlight along the outer edge of the shadow side; Darkest outline paints the shape's outer edge one step darker than the deepest shadow. Colors set to Palette only takes the nearest palette colors; indexed sprites always do.
The swatches under Steps (dark to light) show the result. Edit These Colors copies them into Ramp, where you can change any of them: a ramp is walked for every color it holds, whichever way it runs. Use Shading Ink Shades copies the Shading ink's ramp (a new Auto-Shade starts from it when it holds the base color). Add as Layer Effect keeps it live, so redrawn art is shaded again; its light angle can be animated to turn the light over an animation. On a sprite with a color depth the result stays on the depth.
Color Curve
Remaps values through a curve you draw. Pick a Channel: Value (red, green and blue alike), Red, Green, Blue or Alpha. Each channel has its own curve, a smooth one that bends through the points without overshooting them (Aseprite joins its points with straight lines). In a grayscale sprite the channels are Value and Alpha.
In the curve editor, click to add a point, drag a point to move it, and double-click one to remove it. Below it, the Points list has each point's input and output as number fields, with Remove buttons and Add point (in the middle of the widest gap), so the curve can be edited from the keyboard too. Reset channel straightens the current channel's curve. The Value curve is applied first, then the single-channel ones.
Invert Color
Inverts the channels you tick: Red, Green and Blue are on, Alpha is off. Fully transparent pixels stay transparent. In a grayscale sprite there's one Gray channel instead of the three colors (Convolution Matrix too).
Replace Color
Swaps colors for others.
- From and To: the colors (palette entries in an indexed sprite). Or tick Replace with transparent. Add row adds another From and To pair; Remove row takes one away. All rows apply at once, a pixel takes the first row it matches, and a replaced color is never replaced again by a later row, so rows can swap two colors.
- Tolerance (0 to 255): how far a pixel may be from the From color and still be replaced; 0 takes only that exact color.
Undo History
The history button under Undo and Redo in the toolbar (or Edit > Undo History) opens the Undo History panel beside the toolbar: to its left when the toolbar is on the right, otherwise on whichever side has room. It lists every step you can undo, oldest first, with Original (the sprite before the oldest step) at the top. The current step is highlighted with a filled dot, and steps you've undone (which redo would bring back) are grayed. Each step shows the time it was made (and the date, if it wasn't today); hover over it for the full date and time. Click any row to take the sprite to that point. Click the button again, or press Esc in the panel, to close it.
Undoing never throws work away. If you undo a few steps and then make a new change, the steps you
undid stay in the tree as a branch, drawn off the step where you went a different way. Each
level of branching has its own color. A step with branches has an arrow beside it: click it to fold
them away (the step then shows how many steps are hidden) or unfold them. Branches start unfolded
up to three levels deep; deeper ones start folded.
Click any row in a branch to go back to it. Redo follows the branch you visited most recently.
The history is kept with the sprite, and goes with it in the .pxstudio files you download: open
one and its history is back.
Name a step to find it again later: hover over it and click its ... button, or right-click
it (from the keyboard, press the Menu key or Shift+F10 on it), then choose Name step.... A named
step shows its name in front of its usual label, with a tag and a colored edge, so it stands out in
a long history. Naming a step doesn't change the sprite and adds nothing to undo. The names are kept
with the history: after a reload, on your other devices with Sync, and in the .pxstudio files you
download. The same menu has Rename step... and Remove name.
Naming a step also keeps the sprite as it was at that step as a named version, under the same name, in Sprite > Version History.... The step leaves the history once it's among the oldest dropped, but the version stays until you delete it. Renaming a step or removing its name leaves its version as it is.
The bottom line shows how much memory the history uses and how many steps it holds across every branch, out of 1,000 at most. Past that, the oldest steps are dropped first. How your work is organized explains what undo covers.
In scripts
Scripts can do all of this too: see Document and Adjustments in the scripting reference (the outline is under Drawing).