Animation and the timeline
Add and time frames, play them back, mark loops with tags, work with cels, tween between keyframes, and see neighboring frames with onion skin.
An animation is a sprite with more than one frame. The timeline shows them as columns, with the layers as rows; each square where a layer meets a frame is a cel (How your work is organized).
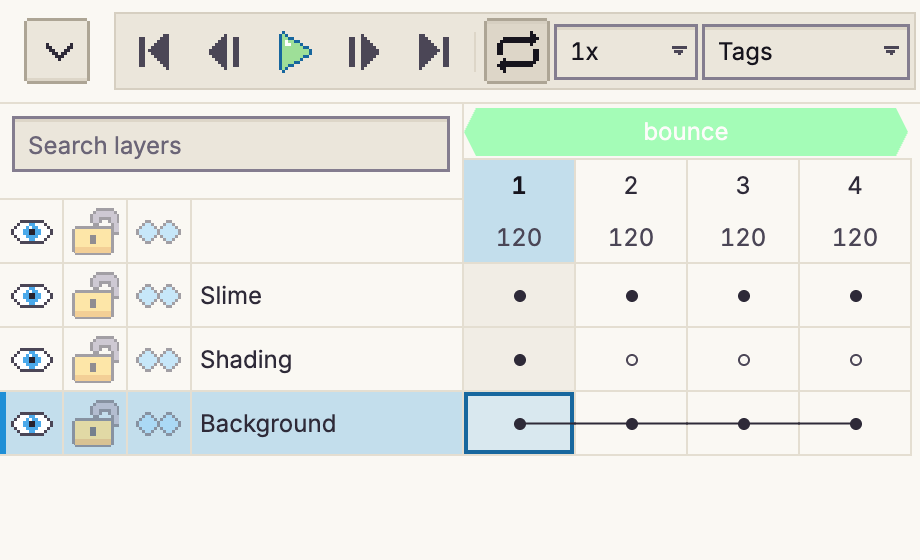
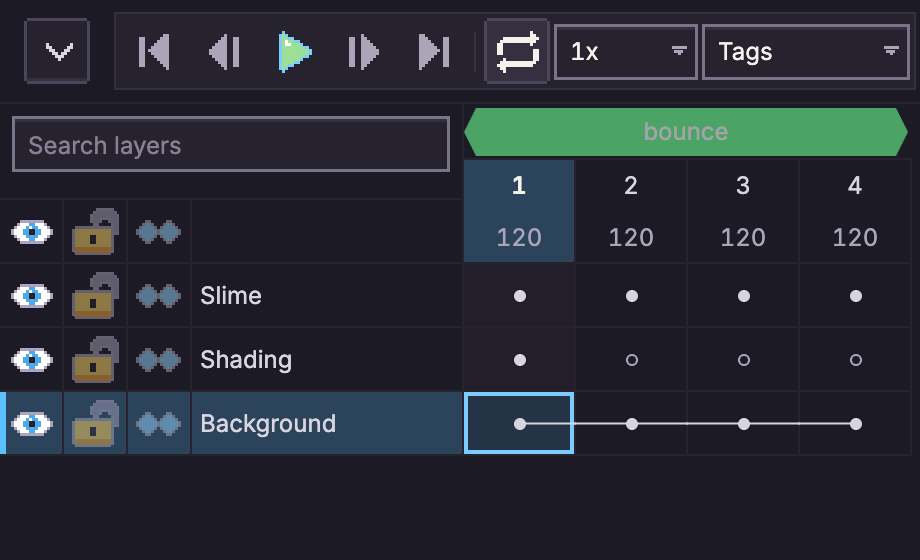
The timeline
Along the top of the timeline:
| Control | Does |
|---|---|
| First, Previous, Play/Pause, Next, Last | Move through the frames (Home, ←, Enter, →, End; the arrows move the selected pixels instead while there's a selection). Previous and Next go round from the last frame to the first and back, as in Aseprite. , and . step inside the current frame's tag instead, looping from its end back to its start, for flipping through one animation. |
| Loop | Whether playback starts over at the end. |
| Speed | Plays at 0.25× to 4× without changing the frames' timing. |
| Playback mode | How tags are played (below). |
| + Layer, reference image, delete | Add a layer (Shift+N), add a reference layer from a file, delete the active layer. |
| + Frame, duplicate, delete | Add an empty frame after the current one (Ctrl+Shift+F), duplicate it (Alt+N), delete it (Ctrl+Alt+Shift+F). |
| Tag | Make a tag over the selected frames. |
Each frame column has the frame's number and, under it, how long it shows in milliseconds: click the number box to type a new duration. Layer rows run down the left, top layer first.
In the grid, a cel with something on it shows a filled dot, and an empty cel shows a hollow dot. A line joins linked cels, the cels that share one picture. Hover a cel to see which layer and frame it is, and what it's linked to.
Frames
The Frame menu, and right-clicking a frame number, have everything for frames:
- Frame > New Empty Frame adds an empty frame after the current one.
- Frame > New Empty Frame Before adds an empty frame right before the current one. It is how you put a frame ahead of frame 1.
- Frame > New Frame copies the current frame (or the selected frames) and its cels. On a continuous layer, the copy's cel is linked instead.
- Frame > New Linked Frame copies it with its cels linked, so the copies share their pictures with the originals: draw on one and both change.
- Frame > Delete Frame deletes the current or selected frames (a sprite keeps at least one).
- Frame > Reverse Frames reverses the selected frames, or all of them if fewer than two are selected.
Timing. Each frame has its own duration, 10 ms to 65,535 ms (about 65 seconds, as in Aseprite). Type it in the box under the frame's number, or use Frame > Frame Properties.... Frame > Set All Frames to Current Duration... gives every frame the current one's duration.
Color and lock. Frame > Frame Properties... also gives a frame a color label, shown as a stripe
on its header so you can spot key poses or frames that need work, and a lock. A locked frame
(marked with a padlock) refuses edits to its cels, and can't be removed, moved or re-timed, by tools
and scripts alike. Unlock it in the same dialog. Both are saved with the sprite and synced, but
.aseprite has no equivalent, so they're dropped when you export to it. Scripts use
app.setFrameProps.
Reordering. Drag a frame by the grip that appears beside its number, or select it and press Alt with ← or →. Several selected frames move together: drag any one of them and the whole selection moves as a block, and frames that aren't next to each other are gathered into one run in their timeline order. Hold Alt while you drop to copy the selected frames there instead; the copies are inserted at the drop point and become the selection. Either way it is one undo step. (Stop playback first.)
Tags follow the frames by position, as in Aseprite: frames dragged out of a tag leave it, and a copy dropped right after a tag's last frame joins the tag, like any new frame added there.
Playback
Press Enter to play and pause. Each frame shows for its own duration, scaled by the speed setting; playback keeps to the clock, skipping a frame if the computer falls behind. Editing anything, or starting to draw, stops playback, as in Aseprite. The playback mode decides how tags are played:
| Mode | Plays |
|---|---|
| Tags (Play tags & repetitions) | Every frame in order. Each tag plays in its own direction and as many times as its repeat count, tags inside tags too, before playback moves on. |
| All frames | Every frame in order, ignoring tags. |
| Once | Like Tags from the first frame to the last, then stops and goes back to the frame you started on. With a tag chosen (below), that tag once: a ping-pong tag goes there and back. |
| Subtags | Like Tags, but when the playhead is in a tag with a repeat of 0, that tag loops (with the tags inside it). |
A tag's repeat counts each pass, and each way of a ping-pong is one pass: a ping-pong tag with a repeat of 2 plays 1, 2, 3, 2, 1. A repeat of 0 plays a tag once on the way through (a ping-pong there and back) and loops it when it's the tag being played. Tags play the same way in exports, as in Aseprite.
To play just one tag, click its band above the frames (click it again to go back to the whole animation). It loops, with the tags inside it playing their own way. With Loop off, it plays its repeat count and stops; so does the whole animation at its last frame.
The Preview panel plays at the same speed, so you can watch the animation while you draw. Its 1:1 button shows the sprite at full size, one sprite pixel per screen pixel.
Tags
A tag names a range of frames ("idle", "walk") so you can play it on its own and export it on its own. Select the frames and press the Tag button, or choose Frame > New Tag.... The dialog has:
- Name and Color;
- From frame and To frame;
- Direction: Forward, Reverse, Ping-pong or Ping-pong Reverse;
- Repeat: how many times it plays before playback continues; 0 loops it forever.
Drag a tag's band to move it, or its ends to change its frames. From the keyboard, Tab to the band and press Alt+Left or Alt+Right to move it a frame, or Tab to one of its ends and press Left or Right. Double-click the band, or use the pencil that appears when you point at it, to edit the tag; right-click it to delete it. As in Aseprite, a tag covers frame positions: a frame you move out of a tag leaves it, one you drop between two of its frames joins it, and a new frame added right after a tag's last frame extends the tag. A new frame added before a tag's first frame is not part of the tag: the tag stays on its frames and shifts along with them.
Cels
Click a cel to select it. Then:
- Shift+click selects a range, Ctrl+click adds or removes one cel, and dragging from an unselected cel selects a rectangle;
- clicking a frame number or a layer name selects that whole column or row;
- Shift with the arrow keys extends the selection, and Esc clears it;
- on a touch screen, press and hold for half a second, then drag.
With cels selected and the timeline focused, the usual shortcuts work on whole cels: Ctrl+X, Ctrl+C and Ctrl+V cut, copy and paste them, and Del clears them. The same commands are in Edit > Cel and in the right-click menu:
- Edit > Cel > Link Cels makes the selected cels on each layer share one picture; Edit > Cel > Unlink Cels gives each its own copy again (unlinking the cel the others were linked to leaves the others linked together).
- Drag selected cels to move them, or hold Alt while dragging to copy them. The outline turns green where they can go and red where they can't. Alt+Shift with an arrow key nudges them one step.
To paint on several cels at once, for example to fix the same outline in every frame, turn on Paint across cels in the tool options bar and select the cels. Painting on one of them paints them all as one undo step; selecting frame numbers or layer names works too. Locked and hidden layers are skipped, and linked cels are painted once. See Tools.
Cels only go where they mean the same thing: pixels onto image layers, tiles onto a tilemap layer with the same tileset. Locked and hidden layers are skipped.
Cel properties (right-click a cel) set its Opacity, which combines with the layer's, its Z-index, which draws it that many layers higher or lower on that frame only (counting every layer and group, as Aseprite does; it can leave a plain group, but not a group with its own opacity or blend mode), and its user data. Linked cels share one opacity and one user data (as in Aseprite); the z-index is each cel's own. The Background layer's cels are always fully opaque, and a locked layer's cel opacity can't change.
Tweening
A tween draws the frames between two keyframes for you: it moves, scales, turns or fades the
start keyframe's picture on its way to the end keyframe, and draws each frame in between as an
ordinary cel. The end keyframe keeps your own drawing. Because the in-betweens are plain pixels,
exports, onion skin and scripts see ordinary frames, and so does Aseprite when you save as
.aseprite (the tween's settings ride along in the cels' user data, so pxstud.io picks the tween
up again when you open the file). Tweens work on image layers, not on the Background.
The Tween inspector
Draw the start and end keyframes on the same layer, select the start keyframe and choose Edit > Cel > Tween... (Shift+T, or right-click the cel). The inspector tweens it to the next cel on that layer with a drawing, or, if you selected several frames, to the last selected one with a drawing. With no later drawing on the layer, a selection over several frames ends on the last selected frame even if it's empty (for a fade or pop out). Opened on a tween's start keyframe or on one of its in-betweens, it edits that tween.
The inspector is a window you can drag by its title bar and leave open: you can still scrub the timeline, draw, and undo while it's there. Esc closes it.
- Preview: plays the start keyframe, the in-betweens and the end keyframe in a loop, at the frames' own durations and with the other visible layers around them. It follows your changes as you make them. Pause it and step frame by frame with the buttons under it. A big sprite shows just the part the tween moves through. The line beside it says how many in-betweens there are and on which frames ("6 in-betweens, frames 3–8").
- Presets: ready-made tweens (see "Tween presets" below). Use preset fills the form; Apply makes it.
- Several layers: shown when your selection covers more than one layer with a drawing on the start frame (see "Tweening several layers" below).
- Pose: the From and End columns set where the picture is at the start and at the end: Position X and Y in pixels, Scale X and Y (1 is the original size, a negative one flips it), Rotation in degrees (clockwise; 360 is a whole turn, so 720 spins twice), Skew X and Y in degrees, and Opacity in percent. Lock scale aspect keeps X and Y in proportion as you change one. Rotate the short way round turns 350° into a 10° step back rather than a nearly full turn; turn it off to spin the long way. Match end keyframe sets the End position and scale so the start picture lands where the end keyframe's drawing is, at its size. A new tween starts with this filled in. Reset From puts From back to no change.
- Easing: how the motion speeds up and slows down. Each small curve is one choice: Linear (steady), Hold (stays put, then jumps at the end keyframe), Steps (moves in equal jumps; set how many), and Sine, Quad, Cubic, Quart, Quint, Expo, Circ, Back, Elastic and Bounce, each easing in (starts slow), out (ends slow) or in-out (both). Use the arrow keys to move through them. Back has an Overshoot, Elastic an Amplitude and a Period (how long each wobble is), and Bounce a number of Bounces. Under Advanced: per-track easing you can give position, scale, rotation, skew, opacity or the color track an easing of its own, for example a bounce on position while the fade stays steady. Draw curve turns the chosen easing into a curve you edit yourself (see below).
- Keyframes: End keyframe picks the frame the tween ends on; move it and Apply to lengthen or shorten the tween (in-betweens beyond the new end are removed, or kept as plain cels if you painted on them). Chain through several keyframes makes a tween from each keyframe to the next, up to the one you pick, in one step; Land each tween on its end keyframe gives every one its own Match end keyframe pose. Extend adds one more tween from this tween's end keyframe to the next keyframe, with these settings.
- Path: how the position travels. Straight; an Arc of a given Height (a jump; negative goes the other way); a Wave with an Amplitude, a number of Cycles and a Phase where it starts; a Zigzag with an Amplitude and Cycles; or a Shake of up to Amplitude pixels each frame. A shake is the same every time for one Seed; Re-roll picks another. Drawn is a route you draw on the canvas (see "Drawing a motion path" below). Orient to path turns the picture to face the way it travels, along any path. Show the path on the canvas draws the route and a dot where each in-between lands.
- Squash and stretch: stretches the picture along its motion while it moves fast and squashes it across, keeping its area. 0% is off.
- Pivot: the point that scale, rotation and skew turn about. Click one of the nine squares (corners, edges or center of the start keyframe's cel), or type X and Y, where 0 is the left or top edge and 1 the right or bottom. With Pivot in: Canvas pixels X and Y are a fixed point on the canvas instead, so several layers tweened about the same point move together as one piece.
- Fade: how opacity changes show (see "Dither fades and crossfades" below). Alpha changes the cel's opacity; Dither makes whole pixels appear or vanish through a Pattern. Crossfade into the end keyframe turns the picture into the end keyframe's drawing.
- Color: tick Animate color to change the picture's colors across the tween. Hue (degrees), Saturation and Lightness (percent) work like Hue/Saturation, and Tint amount mixes every color toward the Tint color; each has a From and an End value. The color track's easing is the one called "Color and ramp" under per-track easing. Each in-between is recolored from the start keyframe's picture, so edits don't pile up. On indexed sprites the recolored pixels snap to the nearest palette color.
- Palette ramp (indexed sprites): tick Shift palette indices along a ramp to cycle colors without recoloring. Pixels that use palette entries First to Last (the transparent entry is left out) move Shift places along that run by the end of the tween, either wrapping around past the ends or stopping at them. Other pixels stay as they are. The swatches show the ramp.
- Resample: how turned or resized pixels are drawn. Automatic uses Nearest (exact pixels) and switches to RotSprite once anything rotates or skews; picking one yourself keeps it. Bilinear blends colors, for painterly art.
- Subpixel: how in-between positions become whole pixels. Monotonic never steps back against the direction of travel, Round takes the nearest pixel, and Floor rounds down.
- Timing: Frames spaces the motion evenly over the in-betweens; Time follows the frames' durations, so a longer frame covers more of the motion.
- Delay (frames): holds the start pose for that many frames, then the motion fills the rest of the tween and still lands on the end keyframe. Under per-track easing each track can wait a different number of frames, for example a fade that starts after the move.
- Exposure: On ones draws a new pose every frame; on twos draws one every second frame and holds it for two, and so on up to eight.
- Ping-pong (out and back): the motion reaches its end pose halfway through the tween and returns to the start pose by the end keyframe, so a loop that ends where it began needs no second drawing. The easing shapes each half.
- Palette Lock: when it's on for an RGBA sprite (Sprite > Palette > Palette Lock), resampled and recolored in-betweens snap to the palette, like anything you paint. A plain move copies the picture exactly. Turning the lock on or off redraws tweens that have Regenerate automatically on.
- Regenerate automatically: redraws the in-betweens whenever the start keyframe or the frames change. Turn it off to redraw them yourself with Edit > Cel > Regenerate Tween.
Apply makes the tween (or changes it) and keeps the inspector open on it; Apply & Close also closes it. Either is one undo step. Problems with a value, or a tween that would overlap another one on the layer, show at the bottom of the window, and Apply waits until they're fixed.
If the keyframes are next to each other there is no room for in-betweens: tick Add and choose how many empty frames to insert between them when you apply. Frames are shared by every layer, so the new frames are empty on the other layers too. If the start keyframe is a linked cel, the inspector offers Unlink, because a tween needs the start keyframe's own picture.
Tips:
- On twos reads as hand-drawn and halves the poses to clean up if you paint over them.
- Keep Monotonic subpixel for slow, eased moves: plain rounding can make the picture jitter back and forth by a pixel. It acts as Round for easings that overshoot (Back, Elastic, Bounce) and for paths other than Straight.
- For anything that rotates, RotSprite keeps pixel-art edges clean and never invents colors. Nearest is faster but leaves jagged diagonals.
- To fix one in-between by hand, just paint on it: your edit is kept when the tween redraws.
- The end keyframe shows your own drawing. For a move that comes to rest, draw (or copy) the resting picture on the end frame; leave it empty for a fade or pop out.
Tween presets
Presets at the top of the inspector holds ready-made tweens: fades, dither in and out, a dither crossfade, pop in and out, drop and bounce, slides in from each side, a swoop along a drawn path, shake, a squash-and-stretch hop, squash and stretch, float, swing, spin and blink. Pick one and choose Use preset: it fills the form, which you can still change, and Apply (or Apply to layers) makes it.
Presets are relative, so one preset fits any drawing and any length:
- distances are measured in the start drawing's size: a slide "from one width to the left" moves a 16-pixel-wide drawing 16 pixels and a 40-pixel one 40, an arc's height and a shake's size follow the drawing's smaller side, and a drawn path stretches with the drawing's width and height. Distances land on whole pixels;
- the motion fills the tween whatever its number of frames, and a delay is a share of it;
- the pivot is a share of the start drawing's box;
- everything else (easing, scale, rotation, opacity, color, squash, exposure, ping-pong, fade) is used as it is. The resample, subpixel and timing settings stay yours.
On an indexed sprite, a preset that fades uses a dither fade, since partial opacity can't show on a palette.
Under Save and manage presets, type a name and Save as preset to keep the current form as your own preset (saving under a name you already used replaces it); pick one of yours to Rename or Delete it. Your presets live on this device, like saved curves: they aren't in the file and aren't synced. Export downloads them as a JSON file and Import… reads one back (on another device, say), skipping anything that isn't a valid preset.
Dither fades and crossfades
Pixel art often can't show half-transparent pixels, and indexed sprites can't at all: an alpha fade there only changes the cel's opacity, which the editor blends off the palette. Set Fade to Dither and the opacity track dissolves the picture instead: whole pixels appear or vanish through a Bayer 2×2, 4×4, 8×8 or Cluster (halftone) pattern, the share of pixels kept following the eased opacity. The pattern is fixed to the canvas, not to the picture, so it doesn't crawl as the picture moves, and a fade in only ever adds pixels. Only whole pixels of the drawing's own colors are kept, so indexed sprites and sprites with a color depth stay exact. New tweens on indexed sprites start with Dither.
Crossfade into the end keyframe changes the start picture into the end keyframe's drawing over the tween (by the opacity track's easing): with Dither, each pixel shows one drawing or the other; with Alpha, the two are blended. Painting on the end keyframe redraws the crossfade.
Tweening several layers
Select cels on several layers (a head, a body and a hat, or the letters of a title) from the start frame to the end frame, and open the inspector. Several layers lists how many layers have a drawing on the start frame; set the tween as usual and choose Apply to layers to give every one of them the same tween in one undo step.
- Stagger by starts each layer that many frames after the previous one, in the Order you pick: top layer first, bottom layer first, or the order you selected them in. A later layer holds its start pose until its turn.
- Length: Finish together keeps every tween ending on the same end keyframe, so later layers move a little faster; Extend keeps the same motion length, so each later layer ends later (frames are added at the end if needed).
- Shared group pivot scales, rotates and skews every layer about one point (the Pivot setting taken over the box around all the layers' start drawings), so the layers move as one rigid piece instead of each turning about its own center.
In the timeline, the frames where a layer waits are drawn with a dashed arrow and a paler tint.
Drawing a motion path
Set Path to Drawn to steer the picture along a curve you draw. It starts as the route you had (an arc becomes a curved path), from the start position to the end position. While the inspector is open, the canvas shows the path with its anchors, their handles and a dot for each in-between:
- drag an anchor (a circle) to move it; the first and last anchors are the start and end positions, so dragging them sets the End position too;
- drag a handle (a square) to bend the curve; the opposite handle turns with it, or hold Alt to move one alone;
- click the line to add an anchor there, Alt-click an anchor to remove it, and double-click one to switch it between smooth and a corner;
- Add anchor and Remove anchor in the inspector do the same from the keyboard.
Anchors and handles snap to pixel centers. The picture travels the path at a constant speed: the
position easing sets the pace along it, not the curve's shape. Tick Orient to path to turn the
picture to face its direction of travel (it starts unturned); RotSprite keeps its edges clean.
The path is part of the tween, so it's kept in .pxstudio and .aseprite files. Changes on the
canvas are staged like the rest of the form until you Apply. Untick Edit the path on the
canvas to see the path without its handles.
Drawing your own easing curve
Draw curve (next to Linear, Hold and Steps) changes the easing into a curve you shape: a square where the horizontal axis is how far through the tween you are and the vertical axis is how far the motion has got. It starts from the easing you had chosen. Drag a dot (an anchor) to move it, drag the squares beside the selected dot (its handles) to bend the curve, double-click empty space to add an anchor, or double-click a dot (or press Del) to remove it. The arrow keys nudge the focused anchor, and the Progress and Amount boxes set it exactly. Corner takes the handles away so the curve turns sharply there. Amounts above 1 or below 0 overshoot. Flip mirrors the curve; Start from replaces it with any ready-made easing to edit.
Give the curve a name and Save to library to keep it for other tweens: saved curves live on this device only, and choosing one from Saved curves loads it into the editor. Saving under a name you already used replaces that curve.
Chains and moving a tween's end
A chain is a row of tweens through several keyframes of one layer, each ending on the keyframe where the next begins, so one drawing can end one tween and start the next. Select the first keyframe and choose Edit > Cel > Tween Through Keyframes to chain through every later keyframe on the layer, each tween landing on its own end keyframe, or use Chain through several keyframes in the inspector to pick where it stops and keep your own settings. It is one undo step. Tweens that already start on those keyframes are replaced.
To move where a tween ends, select its start keyframe through the frame it should end on and choose Edit > Cel > Set Tween End to Selection, or change End keyframe in the inspector and Apply. A tween can't be lengthened into the next one in a chain.
Tweens in scripts
Scripts get the same tweens: app.setTween(layerId, frameId, { to = endFrameId, end = { dx = 12 },
ease = "quad", mode = "out", path = "arc", height = 6 }) tweens a layer's cel at frameId to a
later frame and returns the tween's id, and app.regenerateTween, app.bakeTween and
app.removeTween take the layer and start frame. app.setTweenChain(layerId, { frameA, frameB,
frameC }, opts) tweens through those keyframes in one step and returns the tweens' ids, and
app.setTweenEnd(layerId, frameId, newEndFrameId) moves a tween's end. The options also take
curve (a drawn easing), trackEasing, color and colorFrom (hue, saturation, lightness,
tint), tintColor (a hex string or { r, g, b }), ramp ({ first, last, shift, wrap }),
fade, ditherPattern and crossfade, delay and trackDelay, pivotSpace, orient, and
path = "custom" with points (the drawn path's anchors). app.tweenPresets() lists the
built-in presets and app.tweenPreset("popIn") returns one; pass its recipe as the preset
option to scale it to the start cel. app.setTweenStagger({ layerA, layerB }, frameId, { to =
endFrameId, preset = app.tweenPreset("slideInTop").recipe, step = 2, groupPivot = true }) tweens
several layers in one step. See the scripting reference for every option.
Tweens in the timeline
- An arrow runs along the bottom of the cels from the start keyframe to an arrowhead on the end keyframe. A keyframe can end one tween and start the next.
- The in-between frames are tinted blue. Frames where the tween is still waiting out its delay are paler, with a dashed arrow.
- A small dark diamond marks an in-between you've painted on or moved. Your edit stays when the tween is redrawn, until you use Edit > Cel > Revert to Tween.
- When the start keyframe changes, or the frames or their timing do, the tween is stale: its in-betweens no longer match. The arrow turns amber, and so does the corner of the start keyframe. Use Edit > Cel > Regenerate Tween to redraw it. A tween set to regenerate on its own never stays stale, except on a locked layer.
- A red corner on a start keyframe means the tween is broken: its end frame was deleted or moved before it. Give it a new end, or remove it.
Hover a cel to read the same thing in words ("tween start, to frame 9, stale", "tweened, edited by hand"); screen readers announce it too.
Tween commands
These are in Edit > Cel and in a cel's right-click menu. They act on the selected cels (or the active cel), and any cel of a tween, its start keyframe or an in-between, stands for the whole tween. Each is one undo step, and locked and hidden layers are skipped.
- Edit > Cel > Regenerate Tween redraws the in-betweens from the start keyframe, leaving the ones you edited by hand alone.
- Edit > Cel > Revert to Tween puts the selected hand-edited in-betweens back to what the tween draws.
- Edit > Cel > Bake Tween keeps every in-between as a plain cel and removes the tween, so nothing redraws them again.
- Edit > Cel > Remove Tween removes the tween and the in-betweens it drew. Ones you edited by hand stay, as plain cels.
- Edit > Cel > Copy Tween Settings copies a tween's settings: easing, motion, path and timing, but not where it ends. Edit > Cel > Paste Tween Settings applies them to each selected keyframe. A keyframe that already starts a tween keeps its end; otherwise the tween runs to the next frame on that layer with a drawn cel. Keyframes with nothing after them are skipped.
Onion skin
Onion skin shows faded copies of the frames before and after the current one, so you can see the motion while you draw. Turn it on with View > Show Onion Skin or the onion skin button in the tool options bar. It's set per editor view.
Settings > Onion Skin... chooses how many frames before and after to show (up to 16 each), their opacity and how much it fades per frame, whether earlier frames are tinted red and later ones blue, whether to show only the current tag's frames, and whether the copies draw behind or in front of the sprite. Behind, they draw over the Background layer and under the other layers, so they show on a sprite with a Background. The tint recolors each copy by its brightness, so dark outlines show as dark red or dark blue too. These settings apply to every sprite.
Onion skin follows playback, as in Aseprite. It doesn't wrap around past the first or last frame. With Current tag only, it uses the smallest tag around the current frame, in that tag's direction: in a reverse tag, the "before" frame is the next one along the timeline. With Loop through tag frames it wraps inside the tag, and a ping-pong tag bounces at its ends.