Scripting guide
Write Lua scripts that draw and edit your sprites, run library scripts and generators, and add your own windows and menu commands.
Scripts are Lua programs that work on the open sprite. They drive the same engine as the editor: every tool, layer, frame, cel, tag, slice, tile and palette entry you can change by hand, a script can change with code. Use them to generate art (trees, rocks, textures, starfields), to repeat a tedious edit, or to add commands of your own to the menus.
New to scripting? Your first script walks through writing and running one. This page covers everything around it.
The Scripts menu
| Item | What it does |
|---|---|
| Scripts > New Script... | Names a new script and opens it in the Scripts panel. |
| Scripts > Open My Script... | Lists your scripts: choose one to open it, or rename or delete it. The last five you opened are listed in the menu under it. |
| Scripts > Browse Script Library... | The script library: search, run, fork and heart shared scripts, including the official generators. See The library. |
| Scripts > Script Commands... | Installs menu commands from your scripts (below). |
| Scripts > Scripting API | Opens the Scripting API reference in a new tab. |
Every one of these is also in the command palette (Ctrl+K).
The Scripts panel
The Scripts panel opens when you create or open a script (in the default layouts, docked to
the right of the canvas, so you can watch a script draw; on a phone, in front of it).
View > Panels > Scripts shows and hides it, and a reload reopens the script you had open (its
last saved draft). It has a code editor with Lua highlighting, suggestions for every app.
function as you type, and a description when you point at one. Below the code, an output area
shows what the script prints and any error.
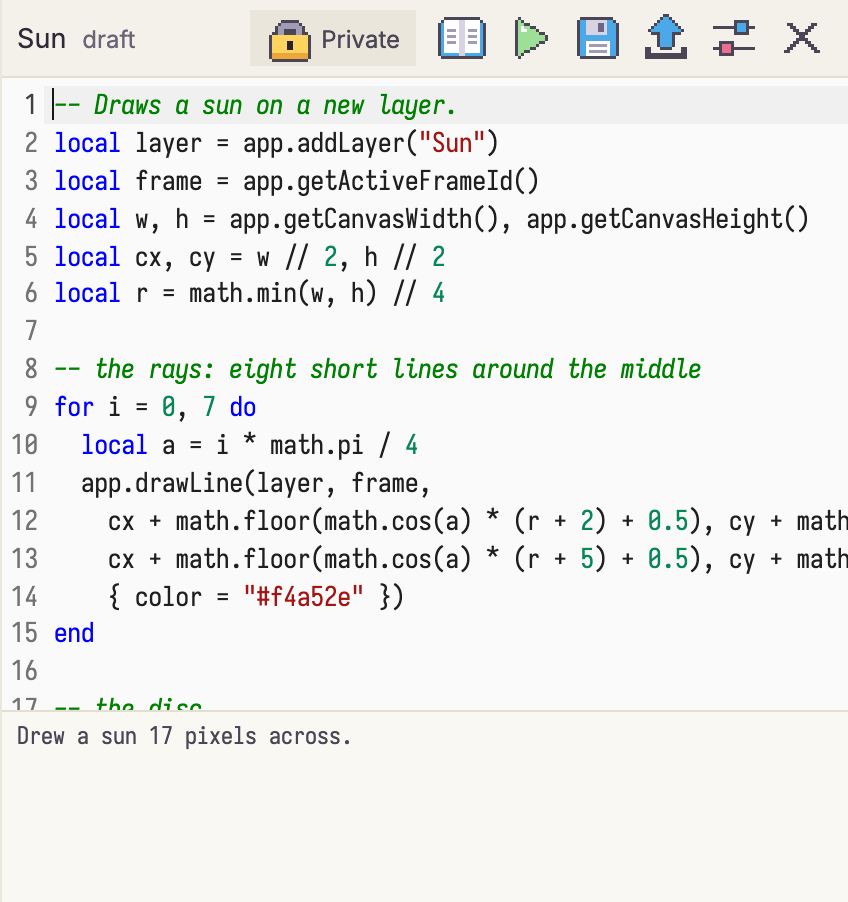
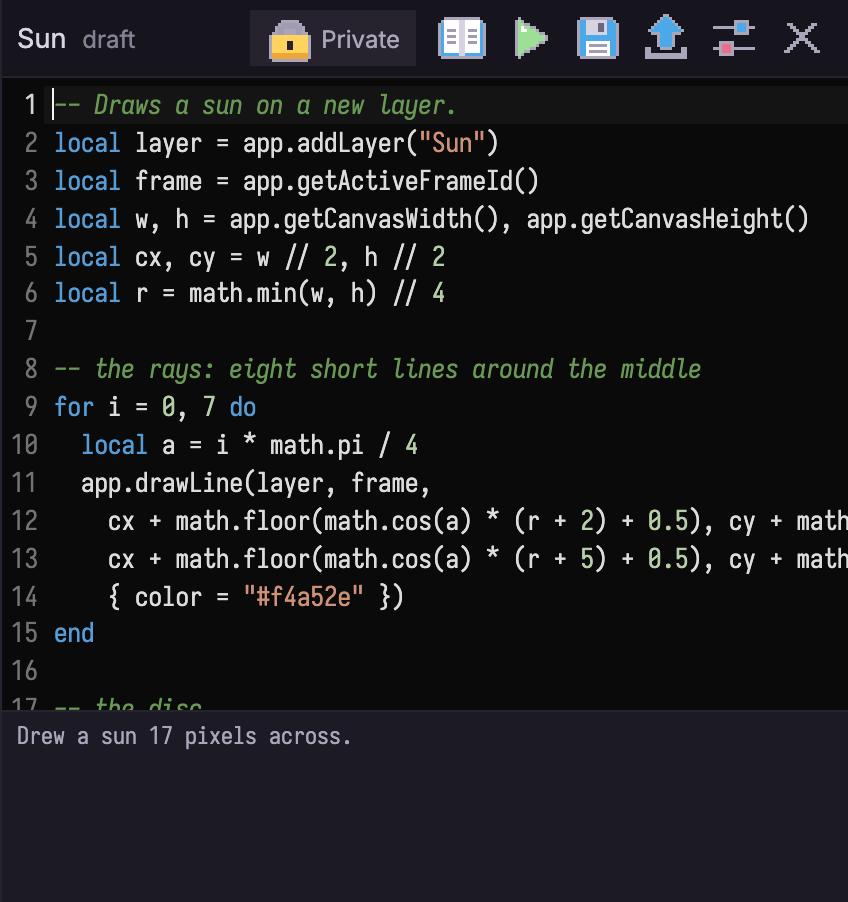
Along the top, from left to right:
- The script's name. Double-click it to rename the script. A
*means there are unsaved changes; next to it, "draft" for a script you haven't published, or the version you're editing ("v2", "v2 · edited"). - Private or Shared: who can see the script in the library. Click it to change.
- Scripting API reference (the book) opens the reference in a new tab.
- Run (the play button) runs the script on the active sprite; a script with a config form asks for its values first. While it runs, the run controls take its place (below).
- Save draft (the disk) saves the script in this browser.
- Publish asks for an optional release note, then saves the script and publishes it as a new version.
- Script settings (the sliders) opens the script's settings: its tags, who can see it, its config form and its published versions.
- Hide panel closes the panel. The open script stays listed in the File menu, with the sprites: choose its name there to show the panel again.
Someone else's script (opened with View code in the library) is read-only. Its toolbar has Fork instead of Save draft and Publish: that copies it into a new script of yours to edit.
Running, pausing and stopping
A script runs on the sprite you're looking at, and you watch it draw as it goes. However much it changes, a run is one undo step: Ctrl+Z takes the whole run back.
Scripts have no time limit. While one runs, its run controls let you end it early:
| Control | What it does |
|---|---|
| Pause / Resume | Stops the script where it is, even in the middle of a loop, and carries on later. |
| Stop | Ends the script and keeps what it has done so far. |
| Stop & Revert | Ends the script and undoes everything it changed. |
In the Scripts panel these are small buttons in the toolbar. A script run from the library covers the editor with a window showing its name, its output and the same three controls, until it finishes.
When a script fails, the output shows the error; in the panel, the line it failed on is highlighted. A script can't paint on a locked layer: the command is refused and the script stops with an error.
Writing scripts
Every function is on the app table. The Scripting API documents each one,
generated from the editor itself, in sections:
- Drawing: the tools as commands (
app.drawLine,app.floodFill,app.drawIsoShape...), Images for working pixel by pixel, and Pixels for flat pixel lists, fills and the eyedropper; - Document, Layers, Frames, Cels, Selection, Slices and Tilemaps;
- Palette, Adjustments and Brushes;
- helpers: Color math, seeded Random numbers, and the Editing context (the current colors, brush and tool options).
A few things to know:
- Start with
print(app.describe()).app.describe()returns the whole sprite's structure: layers, frames, cels, tags, slices, the selection and the current settings. - Settings you leave out come from the editor. A drawing command without a color uses the foreground color; without a brush, the current brush; and so on for each tool option.
- The selection and symmetry apply only when you ask. Pass
respectSelection = trueto keep painting inside the selection, andsymmetry = app.getContext().symmetryto mirror it. - Work pixel by pixel in an Image.
app.getImage(layer, frame)reads a cel into an Image that lives inside the script;img:getPixelandimg:setPixelare cheap, so loop over as many pixels as you like, then write it back once withapp.putImage(layer, frame, img). Everyapp.*call is a trip to the editor, an Image's methods aren't. On indexed sprites,img:getIndexandimg:setIndexwork with palette indices. - Use
app.randomfor randomness. A generator made withapp.random.new(seed)gives the same numbers for the same seed, so a run can be repeated exactly.pairs()visits a table's keys in the same order on every run too. - Use
app.colorfor color math. Mixing, ramps and shades are worked out in a perceptual color space, which looks better than averaging hex values. - Print to check things.
print(...)writes to the output area; tables print in full.
For example, this scatters stars on a new layer; change the seed for a different sky:
local layer = app.addLayer("Stars")
local frame = app.getActiveFrameId()

local rng = app.random.new(42)                        -- same seed, same stars
local colors = app.color.ramp({ "#5a6b9e", "#ffffff" }, 4)

local img = app.getImage(layer, frame)                -- the layer's pixels, inside the script
for i = 1, img.width * img.height // 40 do
  img:setPixel(rng:int(0, img.width - 1), rng:int(0, img.height - 1), rng:pick(colors))
end
app.putImage(layer, frame, img)                       -- written back as one change
Config forms
A script can ask for settings before it runs: when you choose Run (in the library, or in the
Scripts panel), a form opens with its fields (numbers, text, checkboxes, choices, colors, and a brush or palette
from your own libraries), and the script reads what you entered as the app.config table. Fields
can show or hide depending on earlier choices. Randomize rolls new values within the ranges
the script's author chose, for quick variations. The official generators all work this way.
To give one of your scripts a form, write it as JSON in Config form in the script's settings, in the shape the Config forms reference describes; the settings say what's wrong with it before saving. The form is part of the draft and of each published version. A script should still read every field as optional and fall back to its own defaults. For input while a script runs, open a script window instead.
Script windows
A script can open a window of its own with Dialog{}, built the way Aseprite scripts build them:
labels, text and number boxes, sliders, checkboxes, radio buttons, drop-down lists, color fields,
rows of color swatches, buttons and a file picker (small text files only).
local dlg = Dialog{ title = "Quick Fill" }
dlg:color{ id = "paint", label = "Color", color = "#3a8f4a" }
dlg:button{ id = "fill", text = "Fill layer", onclick = function()
  local layer, frame = app.getActiveLayerId(), app.getActiveFrameId()
  app.floodFill(layer, frame, 0, 0, { color = dlg.data.paint })
end }
dlg:show{ wait = false }
dlg:show{ wait = false }opens a floating window and the script waits, idle, while you keep drawing; each button press or change it reacts to is its own undo step. Withoutwait = false, the window is modal: the editor is locked until you close it.- The window's title bar names the script and marks it as a script's, and everything in it is plain text, so a script can't pass its window off as part of the editor.
- Closing the window ends the script; stopping the script closes its windows.
The Dialogs and commands reference has every widget and its options.
Script commands
A script can add commands to the editor's menus, the same way an Aseprite plugin does. Define
an init(plugin) function that registers them with plugin:newCommand:
local function mirror()
  app.flip("horizontal", app.getActiveLayerId())
end

function init(plugin)
  plugin:newCommand{ id = "mirror", title = "Mirror Layer", group = "layer", onclick = mirror }
end
Save the script, then choose Scripts > Script Commands... and press Install next to it. The command now appears:
- in the menu its
groupnames (file,file_import,edit,edit_transform,edit_fx,edit_adjustments,sprite,layer,frame,selectorview), shown with the script's name; without a group, under Scripts, in a submenu named after the script; - in the command palette;
- in Settings > Keyboard Shortcuts..., where you can give it a shortcut.
Running the command runs your saved script and then the command's onclick, as one undo step.
After changing which commands a script registers, press Reinstall; Remove takes them out
of the menus. A script can add up to 32 commands. Installed commands are kept in this browser.
To install commands from someone else's script, fork it into your scripts first.
Saving and publishing
Your scripts are saved in this browser, like your sprites, and work offline. With Sync, they're also kept in your account and on your other devices.
Publishing shares a script in the script library. Every script starts Private, so only you can see it; choose Shared in the library in its settings (Script settings, or the Private badge) to list it. Then:
- Save draft keeps your edits private. People using the library always get your last published version, never the draft.
- Publish saves the draft and turns it into the next numbered version, with the release note you type (shown in the version history). Published versions never change; publish again to make a new one.
- The script's settings list every published version. View code opens an old one read-only, and Restore to draft copies it into your draft.
- A script can have up to 3 tags, which help people find it in the library.
Publishing needs an account with Sync on pxstud.io. Running, forking and hearting scripts (with a free account) is covered in The library.
What scripts can't do
Scripts are sandboxed, so running a script someone else wrote is safe:
- No network, files or code loading. A script can't reach the internet or your files (apart
from a text file you pick in its window), and can't load other code. Lua's
io,osanddebuglibraries aren't there;string,math,table,utf8andcoroutineare. - Only the open sprite. A script edits the sprite you ran it on, as one undo step. It can't open, save, export, close or delete sprites, use the clipboard, or change the view and panels.
- Your libraries only when you pick from them. A script sees one of your saved brushes or palettes only when its config form asks and you choose it.
- A memory budget. A run can't use more than a set amount of memory: for its Images, its Lua data, the pixels it adds to the sprite and the undo step it builds. Past it the script is stopped with an error that says which, and what it did so far stays as one undo step, so a runaway script can't crash the editor or push your earlier steps out of the undo history.
There's no time limit; a script that runs away can always be paused or stopped.
The official generators
pxstud.io's script library has a set of official scripts, marked Official: generators for gradients, checkerboards, noise fills, brick walls, cobblestones, wood planks, grass and water textures, lightning, tornadoes, rainbows, comets, galaxies, planets, stars, trees, bushes and rocks. Sign in with a free account, open Scripts > Browse Script Library..., choose Official, and press Run on one: fill in its form (or press Randomize) and it draws on your sprite. Fork one to read how it's made, or to change it.